
How to Clean Your Shower to Keep It Squeaky Clean
Posted by OXO Australia on 15th May 2023
No one likes scrubbing mildewed grout. To cut down on cleaning time in the shower, make a tool kit of hardworking brushes and simple household staples that cater to every task.
Your bathroom works hard to keep you feeling fresh and clean, but all those steamy showers eventually take a toll. Over time, mildew spores and soap scum accumulate on tile and glass—until your shower needs a bath. Grout is porous, and requires a good scrubbing every season, while shower heads need to be cleaned of mineral deposits every once in a while. Here’s how to tackle each task.
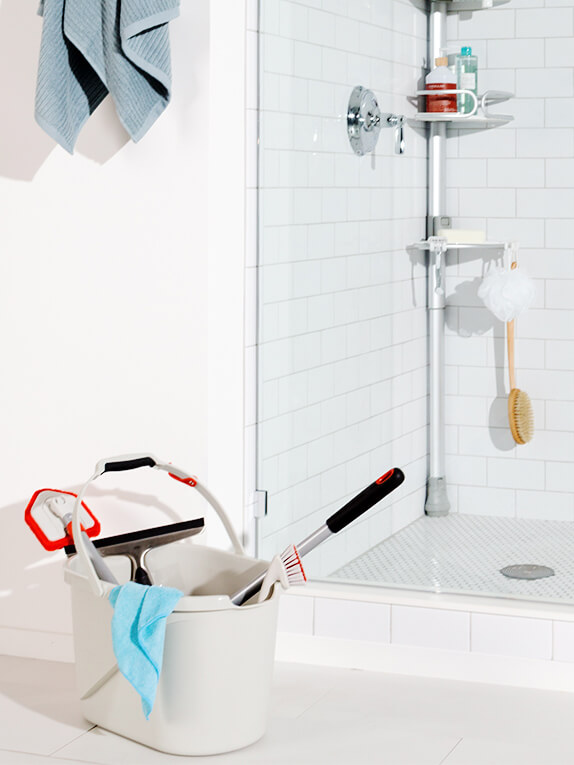
Step 1: Gather all your tools.
The trick to cleaning the bathroom fast is to gather everything you need in one bucket and keep it together, ready to go. Basic baking soda and vinegar are all you need to clean, but scrubbing a shower requires some special equipment for grout and tile. For weekly cleaning, a squeegee makes things go much quicker, and you’ll want a grout brush and extendable scrubber for seasonal deep-cleans. The full range of items you need are:
Step 2: Clean the showerhead first and work down from there.
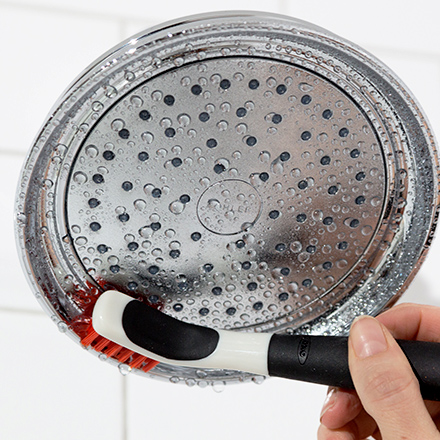
Fill a spray bottle with half water, half white vinegar, and do the same with a plastic bag. Wrap the bag around the showerhead and secure it with a twist tie. Let the showerhead soak while you spray the shower interior with a healthy coating of the vinegar mix. Once the showerhead has soaked for a few minutes, use a deep clean brush to scrub off any mineral deposits.
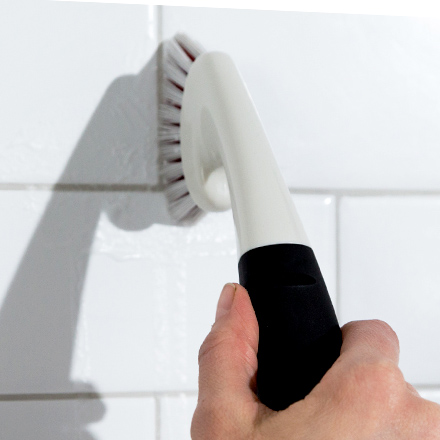
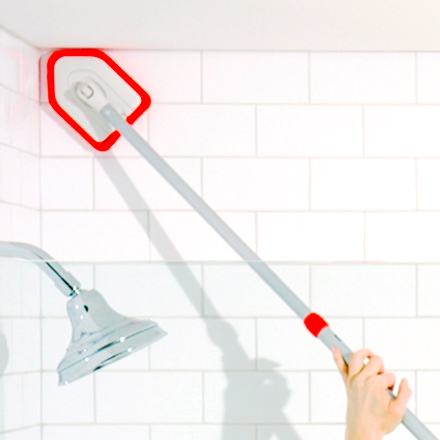
Step 3: Get the grout, tile, and door tracks.
Start with ½ cup of baking soda, slowly adding water until you’ve formed a spreadable paste. Working from the top of the shower down, dip the grout brush in the mixture and scrub the spaces between the tiles. Follow the same track with the tiles, using your extendable brush and scrubber to access any hard-to-reach spots. The vinegar and baking soda will mingle and foam as you scrub, then rinse, the walls. Do the same along the door tracks, lifting any mildew while you work.
Step 4: Finish with the floor and door.
For the floors, avoid crouching with your extendable brush and scrubber. When you’re satisfied with the state of the tile, use the shower head to rinse off any residue. Mist the shower door with the vinegar solution. Run the squeegee under hot water from the shower head, and pull it along the shower door. Follow up with a dry microfiber cloth if necessary. If you have a shower curtain, run it through the wash (but skip the drier) and rehang it when it’s ready.
Good Tip: To keep your shower sparkling, organize all the shampoo bottles and soap that create sticky messes. A Shower Caddy with drainage slots allows things to dry quickly, while removable trays make cleaning easy when it’s time for a thorough scrub-down.
Enjoy your beautiful clean shower!
No one likes scrubbing mildewed grout. To cut down on cleaning time in the shower, make a tool kit of hardworking brushes and simple household staples that cater to every task.
Your bathroom works hard to keep you feeling fresh and clean, but all those steamy showers eventually take a toll. Over time, mildew spores and soap scum accumulate on tile and glass—until your shower needs a bath. Grout is porous, and requires a good scrubbing every season, while shower heads need to be cleaned of mineral deposits every once in a while. Here’s how to tackle each task.
Step 1: Gather all your tools.
The trick to cleaning the bathroom fast is to gather everything you need in one bucket and keep it together, ready to go. Basic baking soda and vinegar are all you need to clean, but scrubbing a shower requires some special equipment for grout and tile. For weekly cleaning, a squeegee makes things go much quicker, and you’ll want a grout brush and extendable scrubber for seasonal deep-cleans. The full range of items you need are:
Step 2: Clean the showerhead first and work down from there.
Fill a spray bottle with half water, half white vinegar, and do the same with a plastic bag. Wrap the bag around the showerhead and secure it with a twist tie. Let the showerhead soak while you spray the shower interior with a healthy coating of the vinegar mix. Once the showerhead has soaked for a few minutes, use a deep clean brush to scrub off any mineral deposits.
Step 3: Get the grout, tile, and door tracks.
Start with ½ cup of baking soda, slowly adding water until you’ve formed a spreadable paste. Working from the top of the shower down, dip the grout brush in the mixture and scrub the spaces between the tiles. Follow the same track with the tiles, using your extendable brush and scrubber to access any hard-to-reach spots. The vinegar and baking soda will mingle and foam as you scrub, then rinse, the walls. Do the same along the door tracks, lifting any mildew while you work.
Step 4: Finish with the floor and door.
For the floors, avoid crouching with your extendable brush and scrubber. When you’re satisfied with the state of the tile, use the shower head to rinse off any residue. Mist the shower door with the vinegar solution. Run the squeegee under hot water from the shower head, and pull it along the shower door. Follow up with a dry microfiber cloth if necessary. If you have a shower curtain, run it through the wash (but skip the drier) and rehang it when it’s ready.
Good Tip: To keep your shower sparkling, organize all the shampoo bottles and soap that create sticky messes. A Shower Caddy with drainage slots allows things to dry quickly, while removable trays make cleaning easy when it’s time for a thorough scrub-down.
Enjoy your beautiful clean shower!